Free Crochet Pattern | Crochet Sweater | Stratum Pullover
- Mar 10, 2023
- 12 min read
Updated: Oct 30, 2024

Introducing the Stratum Pullover!
Get The Crochet Sweater Pattern
You'll find the free pattern if you keep scrolling below.
Purchase this pattern on my website, Ravelry, LoveCrafts, Annie's Crafts, and Etsy.
Share your project on the Ravelry project page.
Wanna make it later? Pin it!
**note that some links may be affiliate links that allow me to make a small commission at no cost to you; however, this influences my opinion in no way, and I will always express an honest relationship with the product(s) referred**


The Design
The Stratum Pullover crochet sweater pattern was simply an attempt to use up some of the yarn in my yarn stash. I had some self-striping yarn I was struggling to figure out what to do with. I wanted to subdue the stripes for a less bold appearance, so I decided to carry it with a creamy white yarn. It was the perfect solution and I love the final look!
The silhouette of this design is classic and basic—featuring a straight body and tapered sleeves, but decorated with a 1x2 faux knit-like ribbing for a clean finish. So, it's the perfect project for the beginner crocheter looking to take on a garment for the first time, and also perfect for the advanced crocheter looking for a relaxing and less intense quick + mindless project.

Fit + Sizing
The Stratum Pullover has an oversized slightly cropped, boxy fit, with a crew style neck and long, tapered sleeves. Sizing is based on Craft Yarn Council's standards. Notes for customizing the length and/or width are noted along the way.
It is designed to have a positive ease of 10-12". To select your size, measure your bust and find the garment circumference in the chart that matches approximately 10-12" larger. If you prefer to have more or less ease, select the garment circumference that reflects that number in inches compared to your measured bust in inches. For reference, model has 34" bust and is wearing a size small.

Size | Bust Circum. | A | Garment Circum. | B | Body Width | C | Total Length | D | Sleeve Length | E | Wrist Circum. |
XS | 28-30" | 40" | 19.5" | 19.25" | 16.25" | 9.25" |
S | 32-34" | 44" | 21.5" | 20" | 16.25" | 9.75" |
M | 36-38" | 48" | 23.5" | 20.75" | 16.25" | 9.75" |
L | 40-42" | 52" | 25.5" | 21.5" | 16.25" | 9.75" |
XL | 44-46" | 56" | 27.5" | 22.25" | 16.25" | 10.5" |
2XL | 48-50" | 60" | 29.5" | 24" | 16.25" | 10.5" |
3XL | 52-54" | 64" | 31.5" | 23.75" | 16.25" | 10.5" |


Materials
Yarn:
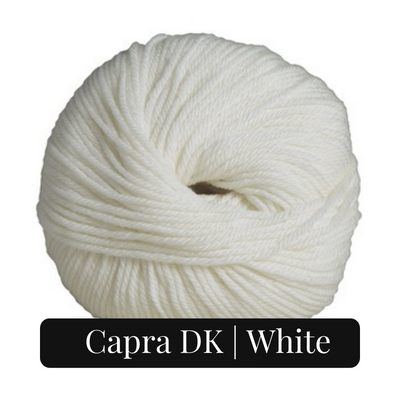
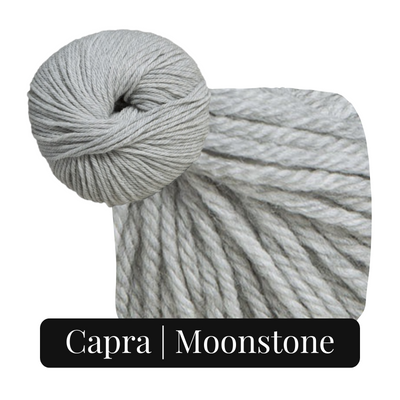
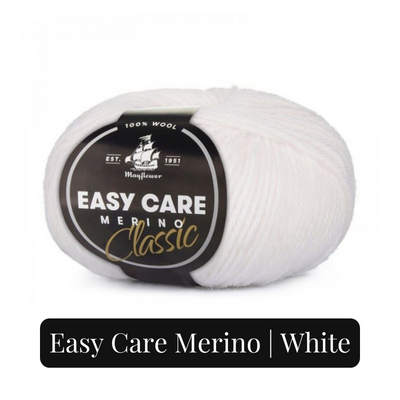
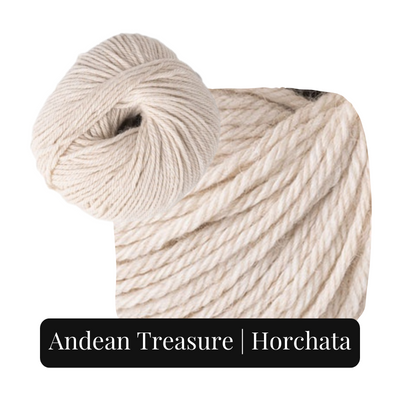
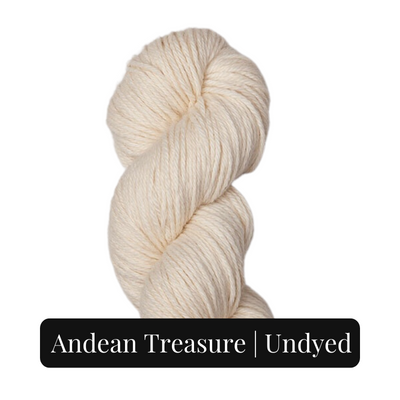
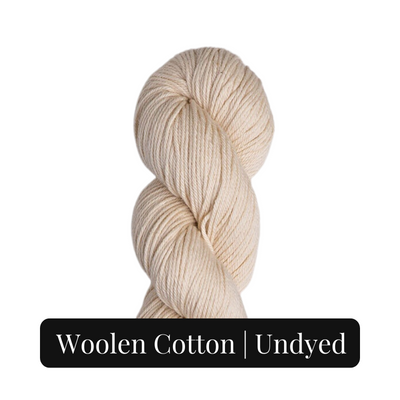
890(983, 1067, 1163, 1278, 1382, 1485)yds category 3 DK weight or category 4 light worsted weight yarn | I used Lion Brand Yarn Comfy Cotton Blend in Whipped Cream
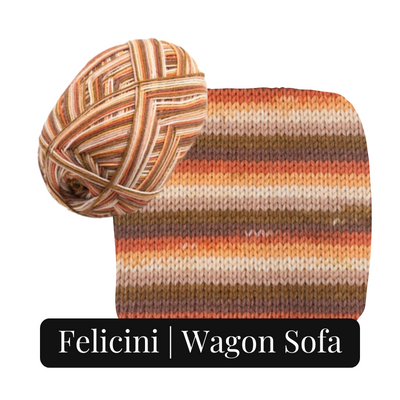
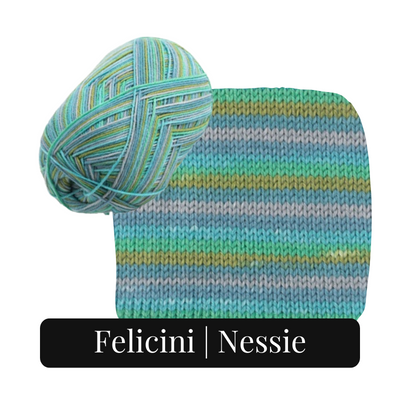
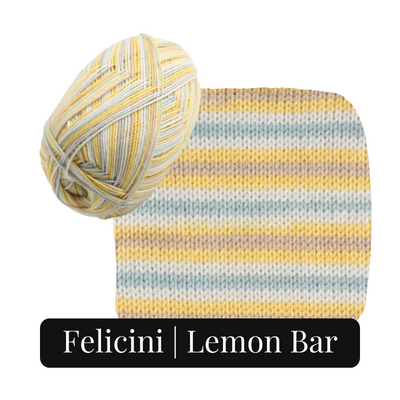
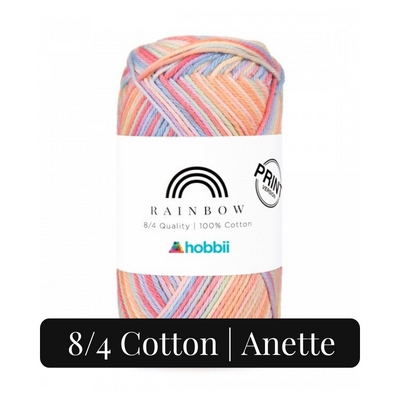
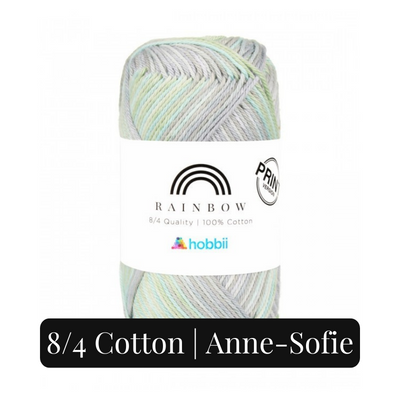
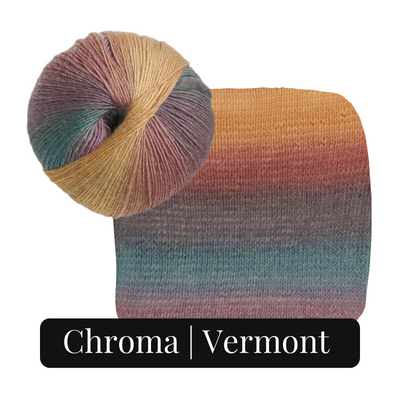
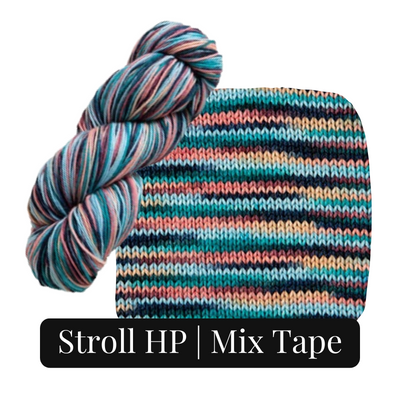
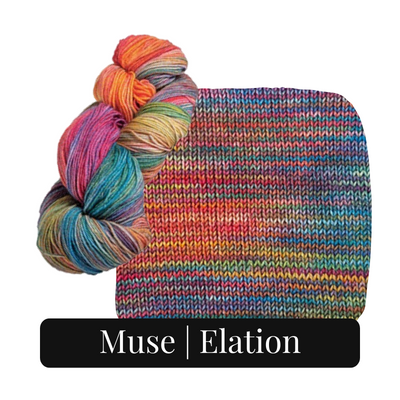
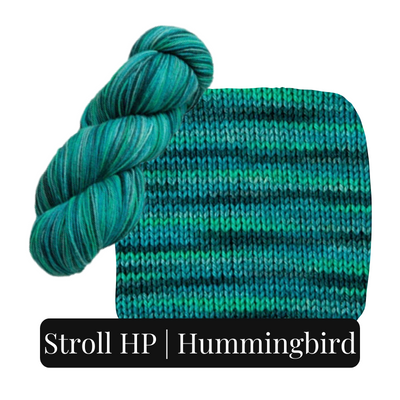
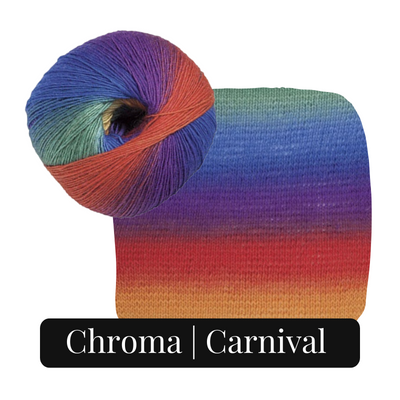
1125(1244, 1350, 1472, 1618, 1750, 1881)yds category 1 fingering weight yarn | I used Knit Picks Felici in Rustic Cabin
Other materials you'll need:
5mm crochet hook
tapestry needle
scissors
st markers
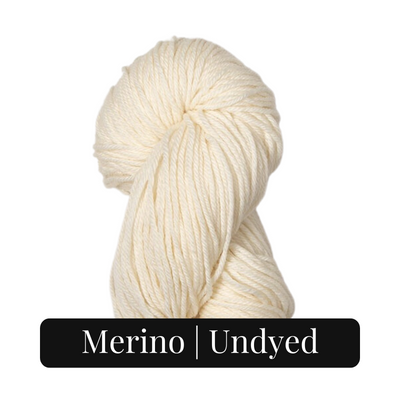
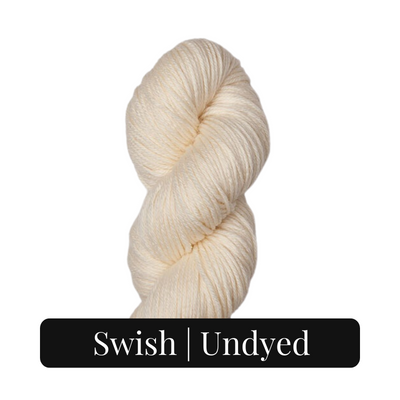
Yarn Substitutes
Lion Brand Comfy Cotton Blend and Knit Picks Felici are discontinued, but that doesn't mean you can't make a beautiful Stratum Pullover! There are so many yarns and colorways out there! Below are just a few combinations, and I try to come back frequently to update the options.
Substitutions for Lion Brand Comfy Cotton Blend:
Non-cotton substitutions:
Cotton substitutions:
We Are Knitters The Cotton (use code WAKAMBASSADOR15 for 15% off)
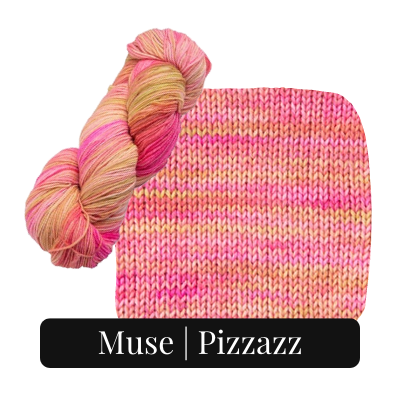
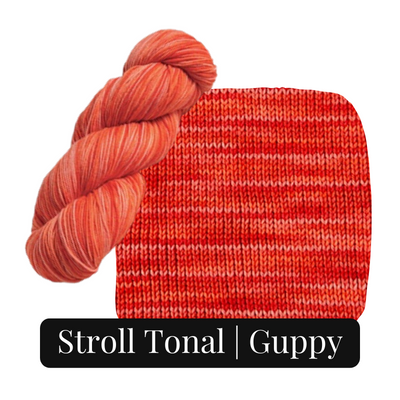
Substitutions for Knit Picks Felici:
If I were to make this pullover again, here are some combos I'd love to explore:


Skill Level
Beginner
Required Skills
basic sts
working flat
working in the round
gauging
seaming
loop recognition
decreasing
adding ribbing perpendicular to an edge
following a pattern with minimal or no photo/video references and tutorials
experience reading a pattern
Stitch Abbreviations
alt | alternating
approx | approximately
ch(s) | chain(s)
cont | continue
dec | decrease
DR | decrease row
FO | fasten off
fhdc | foundation half double crochet
hdc | half double crichet
hdc2tog | half double crochet 2 stitches together
PM(s) | place marker(s)
rem | remaining
rep | repeat
rnd | round
RS | right side
sc | single crochet
scBLO | single crochet in the back loop only
slstBLO | slip stitch in the back loop only
st(s) | stitch(es)
WS | wrong side
yo | yarn over
Video
Gauge
12.5 sts x 11 rows (blocked) = 4" square
Gauge Pattern
ROW 1 | fhdc 20, turn -- (20 sts)
ROW 2-18 | ch 1, hdc in each stitch across, turn
Swatch will exceed 4" square. Measure gauge within margins. For more on gauge, click here.
Special Stitches
hdc2tog
yo, insert hook into next st, yo, pull up loop, yo, pull through 1 loop, insert hook into next st, yo, pull up loop, yo, pull through all loops on hook
Additional Notes
sweater is worked bottom-up; make 2 panels, seam together at sides and shoulders, add perpendicular edging to bottom hem and neckline, add sleeves/cuffs to armholes
turning ch 1 does not count as st
on ribbing, anchoring sl sts do not count as sts
for seaming, I used whip stitch (use whatever method you prefer)
st counts for all sizes are indicated in italic parentheses at end of rows only where count changes; i.e. -- (XS, S, M, L, XL, 2XL, 3XL)
XS is indicated by first number and subsequent sizes are indicated in parentheses that follow; i.e. XS(S, M, L, XL, 2XL, 3XL)
all noted measurements along the way for reference are blocked measurements
I used steam method to block my project as I worked it up (for more on blocking, click here)
carry DK/light worsted yarn and fingering weight yarn together throughout entire project (this is what creates marled effect)

The Pattern
Panel 1
ROW 1 (WS) | leaving 1yd tail for seaming side, fhdc 63(69, 75, 81, 88, 94, 100), turn -- (63, 69, 75, 81, 88, 94, 100 sts)
NOTE: To customize width, add/subtract any number of fhdc sts to/from Row 1. Keep in mind this will impact size/width of neck opening; you may need/want to add/subtract sts to/from shoulder extensions.
ROW 2(RS)-37(39, 41, 43, 45, 47, 49) | ch 1, hdc in each st across, turn; after last row, do not FO and cont to Shoulder Extension 1
NOTE: Panel height should measure approx 13.25(14, 14.75, 15.5, 16.25, 17, 17.75)" at this point. To customize length, add/subtract any number of rows to/from Row 2-37(39, 41, 43, 45, 47, 49) section (ending on an odd number row). Keep in mind bottom edging will add 2.25" to overall length.
Shoulder Extension 1
PM in 24th(26th, 29th, 31st, 34th, 36th, 39th) st from right and left edge of row just completed. To customize neck opening, move PMs in towards or out from center of panel.
ROW 1 (DR/RS) | ch 1, hdc in next 22(24, 27, 29, 32, 34, 37) sts, hdc2tog, turn -- (23, 25, 28, 30, 33, 35, 38 sts)
ROW 2 (DR/WS) | ch 1, hdc2tog, hdc in rem sts across, turn -- (22, 24, 27, 29, 32, 34, 37 sts)
ROW 3 (DR) | ch 1, hdc in each st across until 2 sts rem, hdc2tog, turn -- (21, 23, 26, 28, 31, 33, 36 sts)
ROW 4-6 | rep alt Row 2 and 3, starting and ending on a Row 2 rep -- (18, 20, 23, 25, 28, 30, 33 sts)
NOTE: Each time you complete a DR, st count will dec by 1 st.
ROW 7-10 | ch 1, hdc in each st across, turn; after last row, FO and leave tail for seaming shoulder
Shoulder Extension 2
We'll now create an identical shoulder extension on other side of top of Panel 1. With panel oriented so Shoulder Extension 1 is on top right, attach yarn at 24th(26th, 29th, 31st, 34th, 36th, 39th) st from top left corner of panel (where other PM is).
ROW 1 (DR/RS) | ch 1, hdc2tog (starting with same st), hdc in rem sts across, turn -- (23, 25, 28, 30, 33, 35, 38 sts)
ROW 2 (DR/WS) | ch 1, hdc in each st across until 2 sts rem, hdc2tog, turn -- (22, 24, 27, 29, 32, 34, 37 sts)
ROW 3 (DR) | ch 1, hdc2tog, hdc in rem sts across, turn -- (21, 23, 26, 28, 31, 33, 36 sts)
ROW 4-6 | rep alt Row 2 and 3, starting and ending on a Row 2 rep -- (18, 20, 23, 25, 28, 30, 33 sts)
ROW 7-10 | ch 1, hdc in each st across, turn; after last row, FO and leave tail for seaming shoulder
NOTE: Panel 1 should measure approx 20(22, 24, 26, 28, 30, 32)" wide and 17(17.75, 18.5, 19.25, 20, 21.75, 21.5)" long.
IF YOU LIKE THIS PATTERN, YOU MAY ENJOY THESE OTHER PATTERNS FROM THE COZY KNOT


Panel 2
ROW 1 (WS) | leaving 1yd tail for seaming side, fhdc 63(69, 75, 81, 88, 94, 100), turn -- (63, 69, 75, 81, 88, 94, 100 sts)
NOTE: If you customize width in Panel 1, add/subtract same number of fhdc sts to/from Row 1.
ROW 2 (RS)-44(46, 48, 50, 52, 54, 56) | ch 1, hdc in each st across, turn; after last row, do not FO and cont to Shoulder Extension 1
NOTE: If you customized length in Panel 1, add/substract same number of rows here.
Shoulder Extension 1
PM in 20th(22nd, 25th, 27th, 30th, 32nd, 35th) st from right and left edge of row just completed. If you customized neck opening in Panel 1, move PMs here accordingly.
ROW 1 (DR/WS) | ch 1, hdc in next 18(20, 23, 25, 28, 30, 33) sts, hdc2tog, turn -- (19, 21, 24, 26, 29, 31, 34 sts)
ROW 2 (DR/RS) | ch 1, hdc2tog, hdc in rem sts across, turn -- (18, 20, 23, 25, 28, 30, 33 sts)
ROW 3 | ch 1, hdc in each st across, FO
Shoulder Extension 2
We'll now create an identical shoulder extension on other side of top of Panel 2. With panel oriented so Shoulder Extension 1 is on top right, attach yarn at 20th(22nd, 25th, 27th, 30th, 32nd, 35th) st from top left corner of panel (where other PM is).
ROW 1 (DR/WS) | ch 1, hdc2tog (starting with same st), hdc in rem sts across, turn -- (19, 21, 24, 26, 29, 31, 34 sts)
ROW 2 (DR/RS) | ch 1, hdc in each st across until 2 sts rem, hdc2tog, turn -- (18, 20, 23, 25, 28, 30, 33 sts)
ROW 3 | ch 1, hdc in each st across; FO
NOTE: Panel 2 should measure approx 20(22, 24, 26, 28, 30, 32)" wide and 17(17.75, 18.5, 19.25, 20, 21, 21.75, 21.5)" long.

Seaming
With RS of Panels facing each other (sweater will be inside out), and using tails we left behind when completing shoulder extensions, seam tops of shoulders from Panel 1 onto Panel 2. Using long tails left at beginning of Row 1 of Panel 1 and 2, seam up sides of sweater. To create armhole, stop seaming when you have 19(20, 21, 22, 23, 25, 26) rows left in Panel 1 and 2, achieve an armhole depth of 6.75(7.25, 7.5, 8, 8.25, 9, 9.5)", or achieve desired custom armhole depth you'd like. You may also substitute any sleeve/armhole size for sweater size you're making, if you prefer a smaller/larger sleeve fit.
Neckline Edging
Ribbing is worked perpendicular to neck opening. With RS of sweater facing you, attach yarn at center back of neck opening. Ribbing should cinch slightly towards body.
ROW 1 | ch 8 -- (8 sts)
ROW 2 (RS) | sc in 2nd ch from hook, hdc in rem chs across, sl st in next 2 sts of neck opening to anchor, turn -- (7 sts)
ROW 3 (WS) | slstBLO n each st across, turn
ROW 4 | ch 1, slstBLO in each st across, sl st in next st of neck opening to anchor, turn
ROW 5 | slstBLO in each st across, turn
ROW 6 | ch 1, scBLO in next st, hdcBLO in rem sts across, sl st in next 2 sts of neck opening to anchor, turn
ROW 7-REM ROWS AROUND | rep alt Row 3-6; after last row, whip st or sl st each st of last row to each st of first row to seam ribbing closed, FO
Bottom Hem Edging
Ribbing is worked perpendicular to bottom hem. With RS of sweater facing you, attach yarn at center back of bottom hem. Ribbing shoulder cinch slightly towards body.
ROW 1 | ch 11 -- (11 sts)
ROW 2 (RS) | sc in 2nd ch from hook, hdc in rem chs across, sl st in next 2 sts of bottom hem to anchor, turn -- (10 sts)
ROW 3 (WS) | slstBLO in each st across, turn
ROW 4 | ch 1, slstBLO in each st across, sl st in next st of bottom hem to anchor, turn
ROW 5 | slstBLO in each st across, turn
ROW 6 | ch 1, scBLO in next st, hdcBLO in rem sts across, sl st in next 2 sts of bottom hem to anchor, turn
ROW 7-REM ROWS AROUND | rep alt Row 3-6; after last row, whip st or sl st each st of last row to each st of first row to seam ribbing closed, FO

Sleeves
With RS facing you, attach yarn at center bottom of arm opening (armpit). Work in rnds, turning work at the end of each. For Rnd 1, work 1 st into each hdc row-end around arm opening. Final st count will contain 3 sts more than row-ends available (e.g. Size S has 40 rows available, but final st count of 43); place 2 of these extra sts in the armpit (on either side of side seam) and one at the shoulder seam.
All Sizes
RND 1 (RS) | ch 1, hdc 41(43, 45, 47, 49, 53, 55) sts evenly around arm opening, sl st to first st to join, turn -- (41, 43, 45, 47, 49, 53, 55 sts)
RND 2 (WS) | ch 1, hdc in each st around, sl st to first st to join, turn
Cont sleeve by following instructions pertaining to your size:
All sizes will have a total of 40 rnds. When instructed to do a dec, use DR instructions below. Any rnd not a DR is a Rnd 2 rep. Every time you complete a DR, st count will dec by 2 sts. To customize sleeve length, evenly add/subtract any number of rnds to/from rnd sections that are not DRs, keeping in mind sleeve cuff will add an additional 2.25" to sleeve length. When sleeve rnds are complete, do not FO; cont to sleeve cuff.
DR: ch 1, hdc2tog, hdc in each st around until 2 sts rem, hdc2tog, sl st to first st to join, turn
SIZE XS(S) | dec on rnds 6, 12, 18, 24, 30, and 36 -- (29, 31 sts)
SIZE M | dec on rnds 5, 10, 15, 20, 25, 30, and 35 -- (31 sts)
SIZE L(XL) | dec on rnds 5, 10, 15, 20, 25, 30, 35, and 39 -- (31, 33 sts)
SIZE 2XL | dec on rnds 4, 8, 12, 16, 20, 24, 28, 32, 36, and 39 -- (33 sts)
SIZE 3XL | dec on rnds 5, 9, 13, 17, 20, 23, 26, 29, 32, 35 and 38 -- (33 sts)
Cuff
Cuff ribbing is worked perpendicular to sleeve edge. RS of sleeve will be facing you to start. Ribbing should cinch and curve in towards the arm.
ROW 1 | ch 11 -- (11 sts)
ROW 2 (RS) | sc in 2nd ch from hook, hdc in rem chs across, sl st in next 2 sts of sleeve edge to anchor, turn -- (10 sts)
ROW 3 (WS) | slstBLO in each st across, turn
ROW 4 | ch 1, slstBLO in each st across, sl st in next st of sleeve edge to anchor, turn
ROW 5 | slstBLO in each st across, turn
ROW 6 | ch 1, scBLO in next st, hdcBLO in rem sts across, sl st in next 2 sts of sleeve edge to anchor, turn
ROW 7-REM ROWS AROUND | rep alt Row 3-6; after last row, whip st or sl st each st of last row to each st of first row to seam ribbing closed, FO
Rep sleeve instructions in other arm opening.

Shop + Make
The pattern is also available as a pdf download on my website, Ravelry, LoveCrafts, Annie's Crafts, and Etsy. Don't forget to add your project to the Ravelry project page.
I'd love to see how your projects turn out and support your maker journey, so don't forget to tag me on your photos @thecozyknot and use the hashtags #thecozyknot and #stratumpullover in your post captions so I don't miss your makes and can share them with my community.
Copyright
All pattern images/content on this site are/is copyright protected. Patterns are for personal, non-commercial use only, and are the sole property of The Cozy Knot and Tanya Johnson. It is only through your amazing kindness and integrity that I’m able to do what I do. I appreciate you! Thank you!
If you choose to sell items made from any of my patterns (either paid patterns or patterns free on the blog), do not use my photos as your sales photos. You are required to credit me as the designer of your product for pattern rights using the information below. Please paste it into your seller listings or wherever you choose to market/sell your product(s) — whether this be online or in a physical space (shop/market/etc.)
Pattern Design: The Cozy Knot/Tanya Johnson www.TheCozyKnot.com
Permission for any kind of mass/factory production of items NOT granted. Permission for any kind of video tutorials using my patterns NOT granted.
For full details on pattern policies, click here.